

Set Up a Destination
Candid Data Share delivers your tables straight into a warehouse or database you own. You set up the destination yourself in the Candid app, and Candid keeps it up to date every night. There’s no pipeline for you to build or run.
Before you start
- Data Share must be turned on for your organization. If it isn’t, the Data Share page says Data Share is not yet configured for your organization. Email support@joincandidhealth.com or talk to your Candid account team to get started.
- Each organization can set up a maximum of one destination. If you need more than one destination, contact Candid.
- You’ll need two kinds of access: a Candid login that can open Settings & Integrations, and permission in your warehouse or database to create a user and grant it access to a schema. This can be one person or two.
Set up your destination
Prepare your warehouse or database
Follow the setup guide for your destination type. Each guide lists exactly what to create and grant. In short:
- Create a place for the data. Use a dedicated database and schema. Since Candid will create and update tables in it, don’t reuse a schema to which your own team writes.
- Create a user or role for Candid with permission to create and write tables in that schema.
- Allow Candid’s IP addresses if your destination restricts network access. See below.
Add the destination in Candid
-
In the Candid app, navigate to Settings & Integrations, open the Data Share tab, and select Data Share.
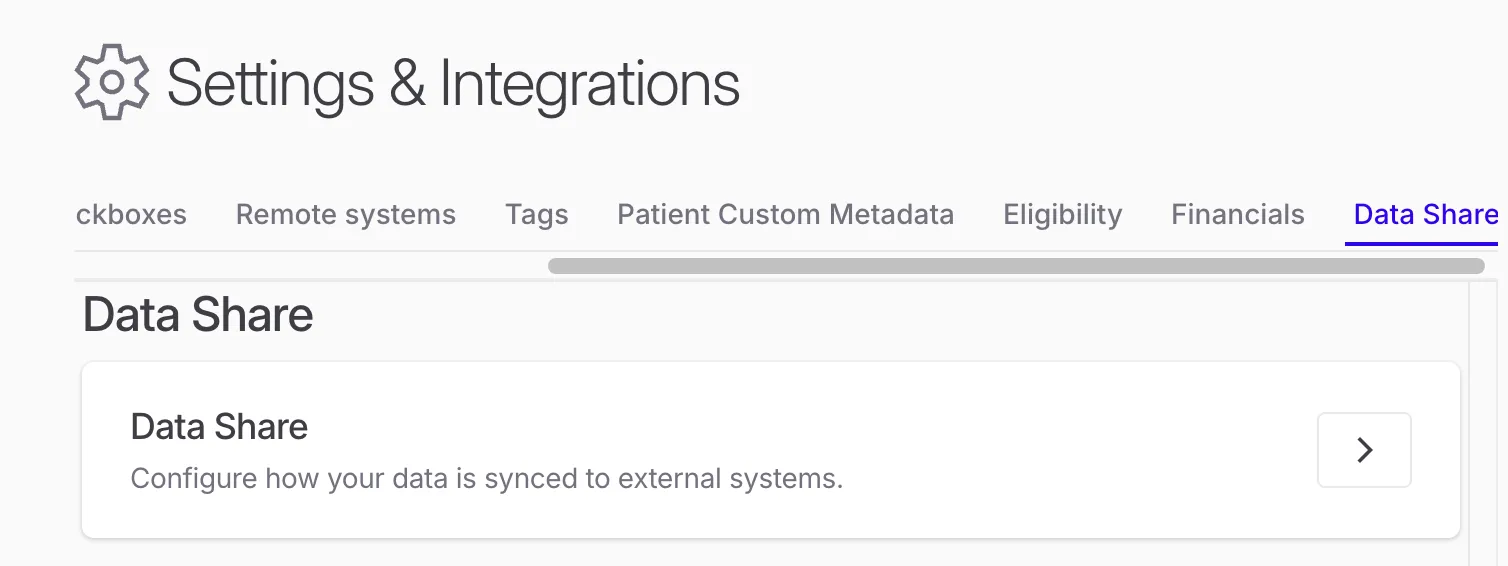
The Data Share tab in Settings & Integrations -
Select Create.
-
Enter a Destination name, such as
Snowflake production, and choose your destination type.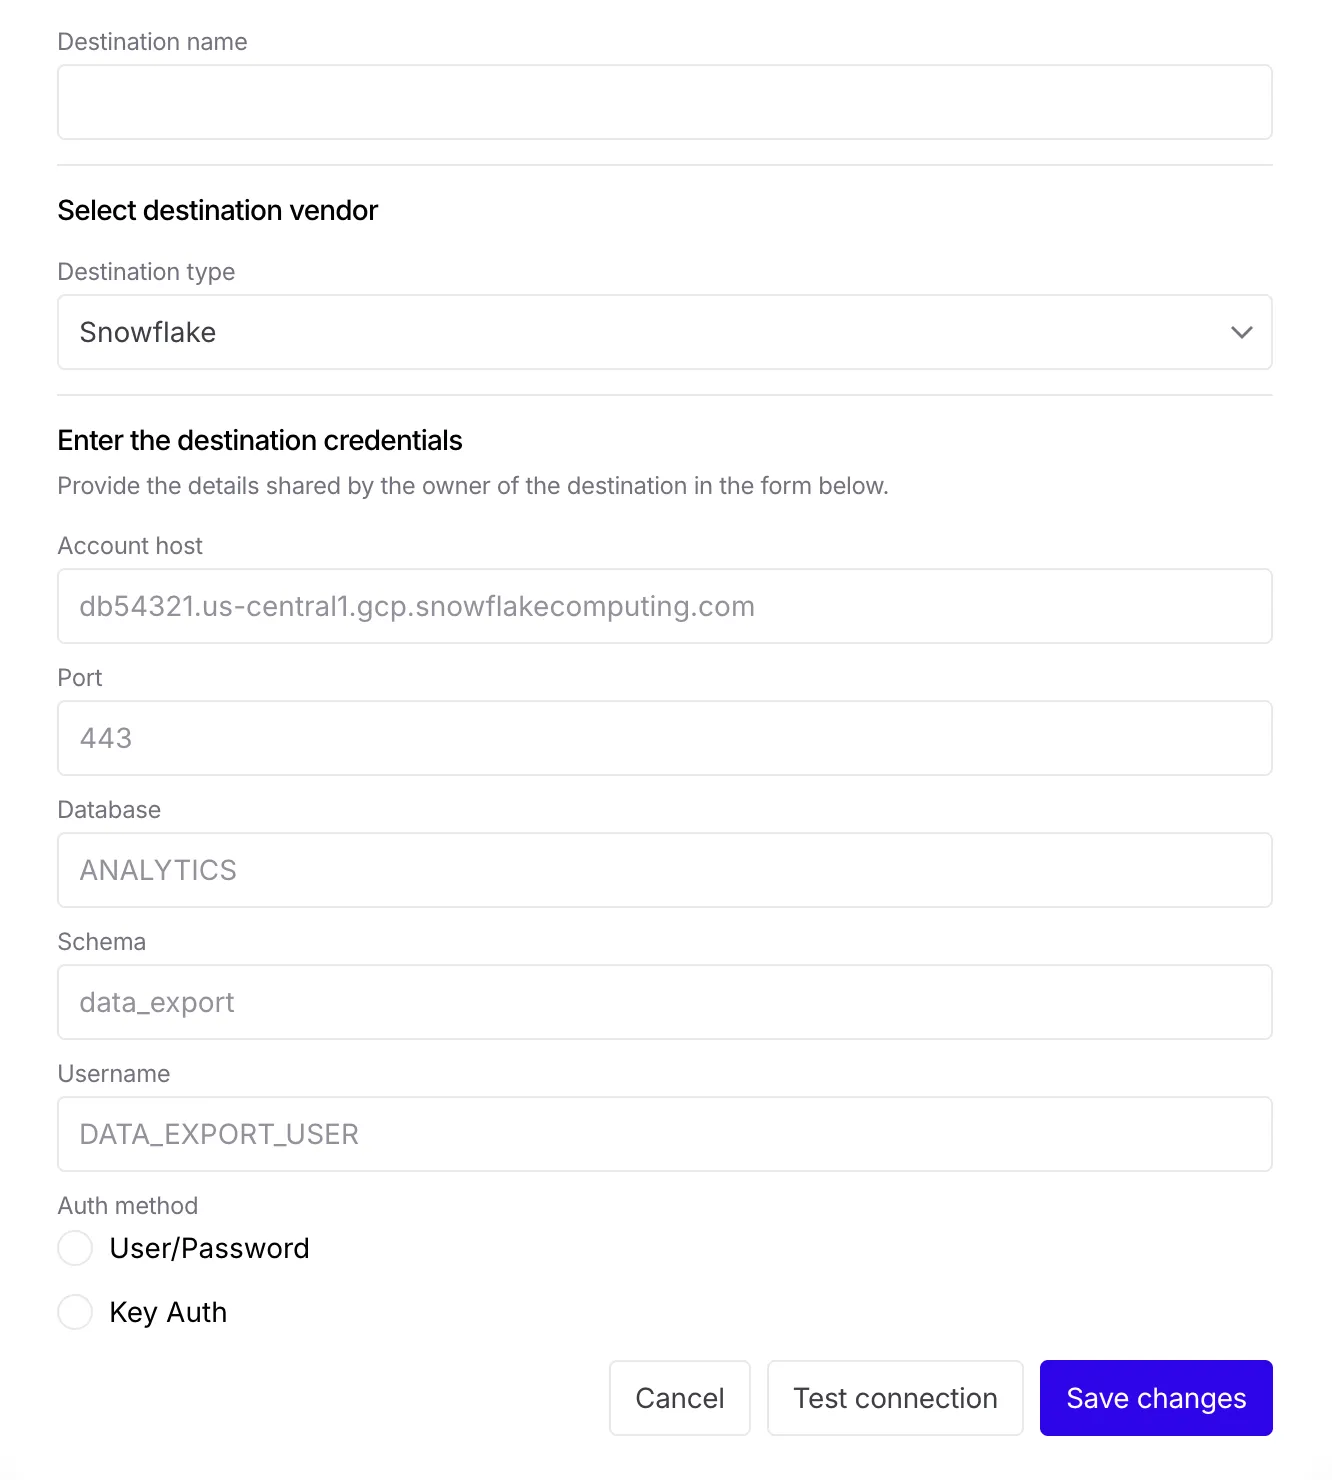
-
Fill in the connection details. The fields depend on the destination type. For Snowflake, for example, you’ll enter the host, database, schema and user. Anything your setup guide says is provided to you, such as a public key, a service account or a trust policy, is shown in the form.
-
Select Test connection. Candid checks that it can reach your destination and write to it. If the test fails, check the details against your setup guide and try again.
-
Select Create destination.
Wait for your first delivery
Candid delivers to your destination every night. The first delivery sends all of your available data, so it can take longer than later ones. After that, each delivery sends only rows that are new or changed.
Until the first delivery finishes, the destination’s Last transfer shows No successful sync yet.
Confirm your data has arrived
When Last transfer shows a date, check that the tables have rows and that the latest change is recent:
Every table should have rows, and latest_change should fall within the last day. To spot-check a record, look up an encounter_id you know from Candid in export_encounter.
Allow Candid’s IP addresses
If your warehouse or database only accepts connections from approved IP addresses, allow both of these:
Allow both, even if Candid connects from only one of them today, so delivery keeps working if Candid’s network changes.
How delivery works
- One table for each Candid Data Share table, with the same names, columns and primary keys as in these docs.
- Rows are updated in place on the primary key. Each delivery updates changed rows and adds new ones, so there’s nothing to deduplicate.
- New columns are added automatically. Select columns by name instead of relying on column order.
- Data is delivered once a night.
Check on your deliveries
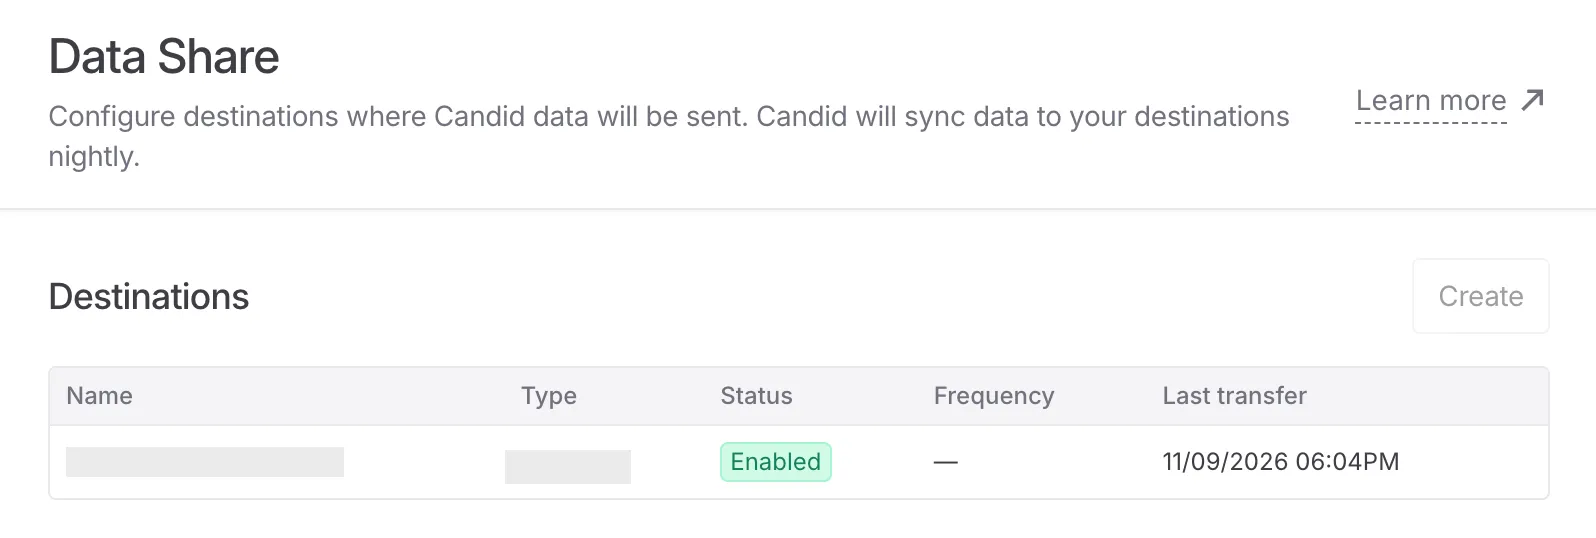
The Destinations table on the Data Share page shows your destination’s type, status, sync frequency, and when its last successful transfer finished. Select the destination to see its details and transfer history: one row per delivery, with the date, rows and volume sent, and a status.
Change or remove your destination
- To update the connection details, such as after rotating a password, select the destination, then Edit. Use Test connection before you select Save changes.
- To remove the destination, select it, then Delete. Deliveries stop, and this can’t be undone. The tables already in your destination stay in place with the data they have, but they no longer update.
- To move to a different warehouse, delete the current destination and create the new one. Its first delivery sends all of your data.
Troubleshooting
Supported destinations
Each setup guide lists what to create and grant on your side. The guides are maintained by Candid’s data delivery partner and open on their site. As you follow one:
- Use Candid’s IP addresses. Where a guide lists IP addresses to allowlist, use Candid’s instead.
- Find provided values in the form. Anything a guide says is provided to you, such as a public key, a service account or a trust policy, is shown in the Add destination form in Candid.
Warehouses
Databases
Lakehouse tables
Don’t see your destination, or not sure which to pick? Email support@joincandidhealth.com.